Translate

Friday, August 22, 2014

Crochet Purse - Celtic Cream

Apparently I'm on a purse kick.  This one really really might end up with my aunt. I have high hopes and grand ideals. I'm a bit stalled until I can come up with purse extras. The ideal was to hit the thrift store and find a purse that I could repurpose the attachments, zipper, and perhaps strap from. I started wanting to do something doily related in a square tote. Its evolved to a Celtic themed bag. The front is a square made from Celtic knot motif. Its a free pattern on Ravelry by Suvi.


My square was done with a H hook (5.00mm) and Carron worsted weight yarn in cream(off-white). With the added border seen in my pic it measures just over 13inches square. I have some black material that is rather thick and almost has a sparkly quality to it. I'll use that as backing for the square and perhaps embroider some leaves in back of the knot. The leaves prompted the design for the back which I was going to make a plain stitch but decided to incorporate a pattern for a doily I liked. The pattern, Blue Rose Doily, will direct you to either of two free pattern sites. They require you 'sign in' with an email address. I suggest your junk address. What? You do have a 'free' email account you use for junk right? So this is the pattern right up until you start with the roses. And I'm not sure I'm going to include them. I was thinking when I finalized the bag dimensions I would make a crochet frame and use gold thread, same as the shimmer and embroidery on front of bag, to attach the vine/leaves to, with the same black backing.


The side panels, and bottom, would be single crochet so I could embroider directly onto the stitches and perhaps do a vine and few leaves. I also am considering crocheting the vine & leaves in cream and attaching it with the gold thread. I'm hoping to find gold d rings, zippers, and maybe a gold chain for part of the strap. I suppose even a light tan leather strap would work. Suvi also has a pattern for a rectangular panel, Book of Kells - Small Celtic Cables , that could make interesting side panels, but they might be too...full and detract from the rest of the bag.

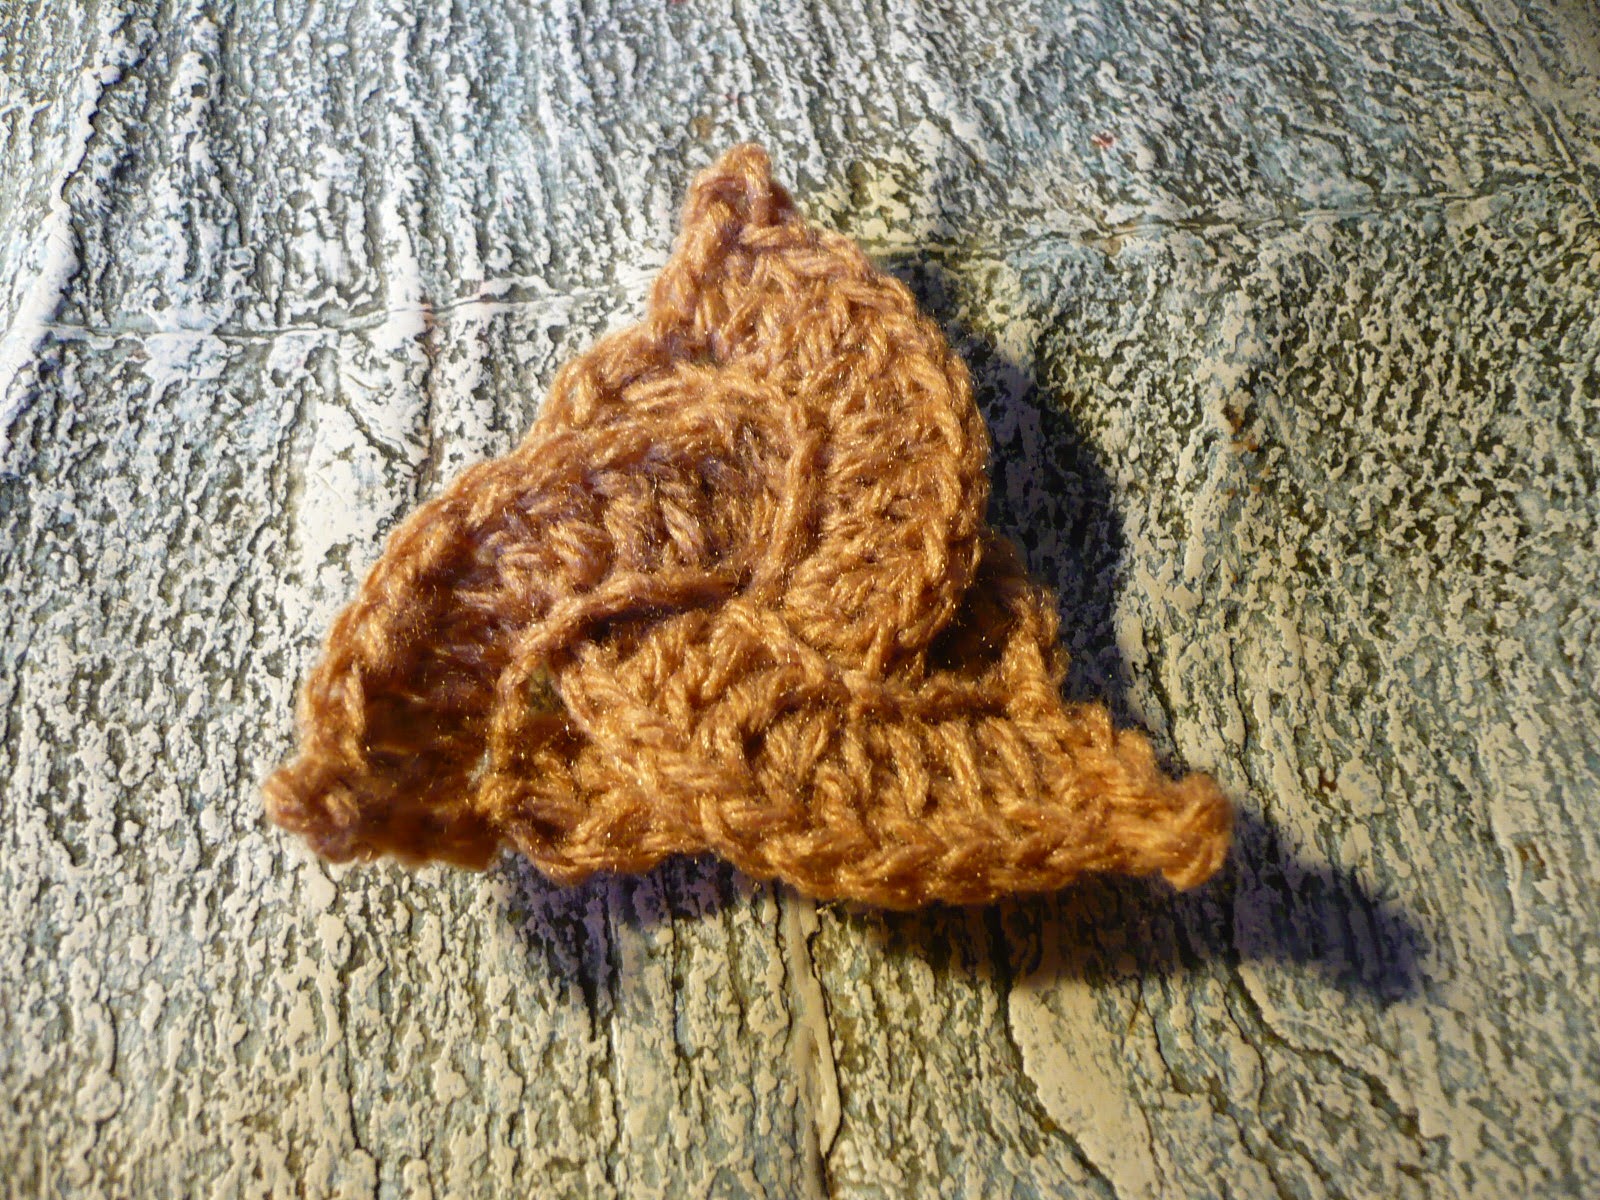
If I can't find the right bag parts I'm considering using this Celtic Triangle from Happyberry as an embellishment to hide the strap joins, a button closure, or maybe as center piece for the back panel lattice work.  It would be in gold thread or floss for the bag, this was just a test of the pattern.


Updates as work progresses.

Crochet Purse - Diamonds in shades of blue and white

I decided on a new project. After searching for "crochet purse" I ran across a blog with some interesting pictures. The blog belongs to Jellina Verhoeff.  Visit in a browser with a translator if you want to do more then check out the photos of her work. She also has a Ravelry account and diamond blanket is the work she made that inspired the purse, diamond bag. (you'll need to sign up but its free and so is the 'pattern')

The pattern links you back to her web site and is very basic. These are diamonds and here is a chart to assemble them basic. I know how things tend to disappear online but I'm wary of posting her actual chart here. If you can't find it through the links please let me know and I'll send it to you and/or make my own reproduction of the bag assembly for this post.

The diamond is pretty simple. It still took me a few tries before I got what I deemed right.
5 diamonds each in 3 colors:

I used an I hook - 5.50 mm

Ch2, turn, sc in second ch from hook(1), ch1, turn, 2 sc in only st (2), ch1, turn, 2 sc in 2 st (4), ch1, turn, sc in each st across (4), ch1, turn, *2sc in first st, sc across, 2 sc in last st (increase by +2 each row), ch1, turn*, **sc across, ch1, turn**.
1=* 2=**  Alternate rows 1 and 2 to grow the diamond. Total of 1 and 2 is 4x. You will have a row of 12 sc at this point. This is your center row.

Then you decrease.
*sc dec2tog first 2 st, sc across, sc dec2tog last 2 st, ch1, turn*, **sc across, ch1, turn**
Repeat decrease 1 and 2 a total of 4x. You'll have 4 sc.
sc dec2tog twice, ch1, turn, sc dec2tog only 2 st, fasten off.
Total of 15 diamonds.

I may have over done explaining that but my diamond took forever to look 'right'.


 Some notes on assembly. First if you don't like to 'sew' you wont like the rest of this project. In the inspiration pictures I could see some of the yarn used to bring the pieces together. It detracts from the clean edges. I considered edging the diamonds in a sc or sl st but that ruined the look for me as well. I didn't consider at the time but perhaps edging in a neutral color and using it to join or (with or without edging) sc the pieces together with the color (most likely black since I used white)  would preserve the cube? The ridge of the join might even add to it. I decided to sew the pieces together with thread. First time I've tried this for overall assembly of a project.

All I had on had on hand was black thread. The pictures show the wrong side of the work. The stitches never went to the 'right' side. This works but only if you keep the stitches tight.


Tada! The finished purse.


The crochet was done in a few hours. The sewing together done the same day. The lining however...
My mother has a sewing machine I borrow when needed. But it's a huge hassle. (you'd think I was going to hurt it) So when it comes to linings, I usually hand sew. I'm not good at hand sewing. I don't do it often. It's a vicious cycle of unskilled procrastination. During the last 'omg I have too many clothes' purge, I set aside a few things to be repurposed. One was a pretty dress that mysteriously got a tear somewhere between the washer and my closet. It made a pretty lining though.

Once again hand stitched with black thread through the wrong side of the work only.


Look there was even a loop, for a tieback, that I used with a clamp for a closure.


 The loop attaching the ring to purse is a sc foundation row plus a single row of sc of the other two colors (12). The ring was made to hang curtains from a rod. That's where the little clamp came from. In a former home I had several windows that used these and now they are just packed away. I have bags of them in this natural color and a dark brown.
The strap/handle is 2 rows of the herringbone stitch in white and a reversed sc along the edges. The lower part in the photo to the left is the right side. I was going to line the strap. But yeah I hate lining. I had the pieces cut out and everything. If I'd had the machine handy, maybe. The reverse single crochet is pretty sturdy and the purse isn't large enough to stuff full of junk so I'm going without. I think it looks better. The lining was a bit dark for the strap.

This was made with my aunt in mind but I'm doubtful it will end up with her. I tend to lose the courage to hand out homemade gifts if I've struggled with the design at all.

The Excuse

So yeah I haven't blogged much. It's sad. The story is I did some major cleanup and reorganizing for Christmas, last Christmas. And I knew if I started pulling out yarn it would grow in large piles/bags around my computer. I even bought a tote for under the desk and every time I get the urge I think no, you'll only make a mess. No ones asked me to make anything and there haven't been any real occasions or invitations to justify digging into my stash. My only contact has been gazing longingly at the yarn isle, the half of one side of an isle its down too, at Wal-Mart. There was the short reprieve of back-to-school stuff to ogle but no new yarn for over a year! I've been reading and writing and playing a lot of Warcraft. (MMORG) Alas my Wow account is frozen until the new expansion because there isn't much point until then. (Dec) Rift just isn't the same. I do have my homemade bag of leftover yarn which I've used to make little things. Pen covers to ease the cramp of my fingers and that stupid writing bump. The store bought 'jelly' ones are ok but the crochet is easier to vary the thickness and using it contours it to your grip. Also it identifies those pens I will hunt down if they disappear. Its a family affliction to have a 'thing' for writing implements. We hide, steal, and horde them, even if they no longer work. The three worst offenders are myself, my oldest son and my father. (my sister would be included if she didn't live hours away) But we've come to terms somewhat. My son prefers mechanical pencils, my father black ink and myself any color but black ink. So it kind of works out.
Then there are the cute things I run across by accident. I found an owl pattern very similar to others I've seen but this one was made to be opened as a pouch and not stuffed. My youngest son's birthday is in Oct. and I thought they would make cute little favors to include with the cupcakes and massive amount of cookies I know my mother will bring in for his class. Owls are the school mascot. Using my scraps I could vary the owls so almost every one was unique. And then fill them with dollar store goodies. Tiny Erasers, toys, and wrapped candies. The ideal just really appeals to me.

The little prototype needs a better 'latch'. I used a loop from the hood around it's beak. I was thinking maybe a long bead instead. The eyes aren't attached and the owl was a little larger than I was shooting for. But otherwise it would work. So I will be visiting a craft store soon! (Yay)
A few days ago I got the urge to make something... else. My first thought was to pull out some of the wip's  that sit in my stash. That star blanket of scraps that could use a few more rounds was a contender. But I decided on the tank top I was making from a repurposed pullover I made for my youngest. It was the softest baby blue variegated yarn. (stonewashed denim 'ish) He loved it and wore it all of once.
It's still a wip but it is further along and sits in a tote ready to go with me should I need something mindless to do while carting the kids here to there or watching the youngest run about.

Monday, March 24, 2014

Crochet Keyboard Bunny


So every year; someone gives us plastic eggs, we buy some for a crafty school project , and/or the crate of eggs we own disappears until the day after Easter and we must raid the dollar store for more. And what does one do with a crate of plastic eggs? I have been thinking about something to use to clean the dust/crumbs/hair that ends up in my keyboard.  Nothing actually Cleans a keyboard but poppin the keys and scrubbing it out but my keyboard seems to be a crap magnet. And for in between cleanings a cotton duster with (or without) a spray of half/half water alcohol does a sufficient job. There are a few choices online of patterns for such a thing, but none with an EGG!
My bunnies lack a proper nose and eyes, perhaps some puffy cheeks but the male quotient in this house demands less cute to get actual use out of the 'bunny'. FYI the tie is meant to represent ears I know there is someone going "How is that a bunny?".. or maybe its all in my head.

Keyboard Bunny

Start with a magic circle
1.  6sc in the circle.(6)

 Loop Stitch (LS) : insert hook into stitch, move hook to the right over the working yarn from tension finger to project, then move hook behind that strand and hook the yarn from other side of finger and pull through stitch, yo and pull through 3 loops on hook. (search loop stitch for you tube tutorials)

2.  2 LS in each stitch around. (work in round no join st) (12)
3.  *1LS in next st, 2 LS in next st*, repeat ** around (18)
4.  1 LS in each st around (18)
5.  repeat last round (18)

Good time to pull starting string to inside and weave to hold ring snug

6.  Sc around, slst in first sc of round to join, turn (18)
7.  sc in each st around, slst to join, (18) no more turns
8.  *1sc in next 2 st, sctog next 2 st*, repeat around, slst to join (14)
9.  sc around, slst to join (14)
10. repeat last round (14)
11. *sc in next st, ch 1, skip st*, repeat around, slst to join. Fasten off (7sc and 7 ch spaces)

Make chain approx. 60 st long. thread through chain spaces of last round. Insert plastic egg, cinch closed and tie in a big floppy bow.


Sunday, November 10, 2013

November snuck up on me again!

I guess I should be glad that doesn't read Dec. I'll be getting into making holiday stockings and gift card holders soon. Maybe this will be the year I actually get that bazar table and sell off all the completed projects I have stashed around. We shall see. If I don't get back Happy Holidays!

Crochet hook caddy

I've seen a lot of similar items online lately. I believe the first was on Moogly's blog. It was a bit large for what I needed though. I have a plastic zipper case with slots for my hooks and still they all manage to end up under my pc monitor in a pile.


 The center is a paper toilet paper roll with the top edge covered in a piece of blue material. The crochet it made from top to bottom and decreased with the change in colors. The light blue at the top doesn't extend all the way to the bottom to conserve bulk from being wrapped. The light blue was 19 rows to cover the roll with the last row being worked in the back stitch only. After adding the other colors the light blue is sewn snuggly around the roll, and the rest wrapped. And the end sewn in place.
 
Using H hook, ch 13, sc in scond ch from hook and across, 12 st. 18 rows of sc . 19th row of sc worked in back loops only. 2 rows of dec on top end, at end of row ch5, sc in second sc from hook, next 4 ch and row of sc. 2 more rows of dec on top end. (material should now extend to bottom of paper roll. 16 rows. 3 rows dec on top end. 16 rows, 2 rows of dec on top end. 15 rows.
 
The bottom is a magic circle with 8 sc in the loop and increase rounds. 4 rounds total and then sewn through all ends of wrap to attach bottom. Several stitches are sewn through the paper roll as well.
 
I considered making 2 circles for the bottom with a washer or something heavy between but then decided to just through pennies into the tube. It actually didn't need anything to weight it down though. With my pens in the center and hooks along the sides its just tall enough to remain nicely balanced.

Crochet Winter Slippers

It's getting to be that time of year again. My pc is next to a lovely bay window, which is great in spring and autumn. Not so great in winter, even after the window is sealed it gets freakin cold. So I pull out my shawl and lapghan and where are my slippers?  Every year my slippers go off to that mystical place of single socks, lonely keys, and flashlights that can only be accessed when your not looking for any of the actual items there. Slippers are a popular crochet item, but not all patterns are created with extended wear in mind. Yarn fibers reeeelaaax. And so those cute high top moccasins with the peek a boo toe become a floppy pile of string that falls off your foot. Most of my past creations have become un-wearable before my toes thaw. Even with revamping and elastic some models just couldn't be saved. So over experimentation I've discovered certain things that will extend the wear of high traffic slippers. Now don't get me wrong all those cute granny slippers have their place. Possibly by the door when you get new carpet or a gift for Aunt Do who keeps them under the bed for midnight emergencies. Perhaps you should understand that I'm one of those people who when isn't at work, or on an errand I'm barefoot. Why not just wear socks you say? Then I'd have to wash them. A pair of socks for everyday lounging doing... not much. And then amazingly even after years of buying the exact same pack of identical white tube socks so they will all match I end up with 12 obviously different socks and not one pair. I think the washer is cursed. The best creation so far was the most simple easiest pattern ever. I can not locate the web page from 2 years ago. But a woman was making simple slippers for a shelter she supported with crochet items. The pattern was a crochet rectangle folded long sides together. One short end was sewn together, the heel. The opposite top long side was sewn 2/3 closed. The open short end was gathered and pulled tightly closed to form the toe. Tada done. BTW these were worked with worsted weight yarn 2 strands together. I made the center of my rectangle, the sole, 3 strands together. No cuff but when paired with the leg warmers I'd made they were perfect. Extensive use just made them look better actually, just be sure to not make them too long. The more snug the longer they will wear. So now I know I want a slipper with: a separate multi strand sole, a dense/short stitch, snug fit, slouchy leg warmer'ish cuff. The pattern I used for the base of the slipper I found on Ravelry but is from Bernat's free pattern pages, Slipper Boots. I looked at a lot of patterns before deciding this was the one. They look like rain boots to me. But the good news is it worked really well. I used 2 strands of worsted weight instead of chunky yarn and went up a size to the large. My foot is 10in long and these fit well, which means snuggly but with wiggle room.


The 2 strands together was just a tiny bit shy of gauge. The top of the foot, below, was worked single strand. Which is why I went up a size. you could maybe go up a hook size. But I wanted a tight stitch and it will relax, so even if it is a bit snug after the breaking in period it should be fine. You could also continue using 2 strands which would tighten the stitch and be warmer and hold the shape longer.


The sole and upper are assembled as in the pattern. I had tried the join stitch from the bottom but it left a "not well sewn" look to the top. I could have whip stitched it together but decided the join actually made a nice color break. That's where I completely deviated from the pattern. You could had any 'cuff' or edging you like. I choose 2 rows of dc alternating front and back post. If you were going to use elastic I'd recommend doing so here, perhaps starting the dark green with a sc over the elastic.

I followed the post stitches with dc's in the back loop only. It just added a small ridge to end the cuff. The next row I increased the dc's every 8th stitch or so, to give it a little bagginess. Oh I also used the next size up crochet hook for everything after the posts. A couple more rows of dc, however many your comfortable with as this is the attached leg warmer it can be just over the ankle or up the calf. Though you made need more elastic or a tie for the top if its too tall on the leg. The final two rows are again alternated front and back post stitches. With that last row every 4th front post was done around 2 posts, to give it gather. I fully expected mine to slouch but I didn't want the top to be hanging open.

I really like these. So much so I'm considering making a few pairs as holiday gifts.